# meteo-qt ## Overview meteo-qt is an application to display weather information in desktop panels, desktop notifications and its own window. 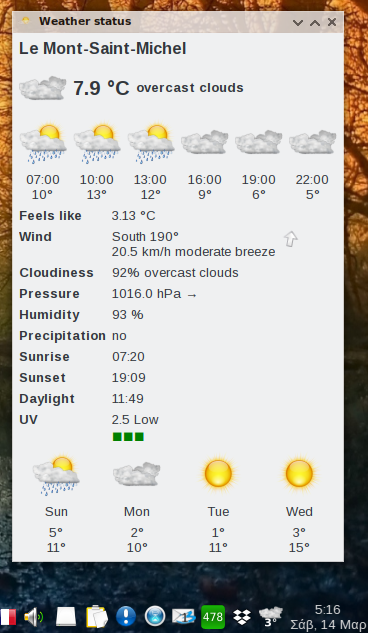 Weather data is taken from [OpenWeatherMap](http://openweathermap.org/). The application is based on Python 3 and Qt 5. It is licensed under the GNU General Public License version 3 (GPLv3). ## Getting started After satisfying some runtime dependencies meteo-qt can be run right from the source tree. Installing is possible as well and relying on on a file `setup.py` as commonly used in Python. This enables every regular user to run the application and updates the translations comprised in the code. Also, some binary packages are available. The following sections will describe all three approaches stating some major Linux distributions as example. ### Runtime dependencies These are [PyQt](https://www.riverbankcomputing.com/software/pyqt), [SIP](https://riverbankcomputing.com/software/sip) and [lxml](http://lxml.de) which can be installed as follows: **Arch Linux** ``` # pacman -S python-pyqt5 python-sip python-lxml ``` **Debian, Derivatives** ``` # apt-get install python3-pyqt5 python3-sip python3-lxml ``` **Fedora** ``` # dnf install python3-qt5 python3-sip python3-lxml ``` **openSUSE Leap** ``` # zypper install python3-qt5 python3-sip python3-lxml ``` (SIP packages stated for the sake of completeness only. In fact they all are a dependency of the respective PyQt packages.) ### Running from the sources Once the runtime dependencies stated above are met the application can be run from its sources by invoking ``` $ python3 /path/to/meteo-qt/meteo_qt/meteo_qt.py ``` ### Installation from the sources #### additional dependencies In addition to the runtime dependencies stated above binaries`pylupdate5` of PyQt and `lrelease` of [Qt Linguist](http://doc.qt.io/qt-5/qtlinguist-index.html) are needed. Binary `lrelease` still comes as Qt 5 and 4 version in all major distributions so it must be ensured the former is used. This document describes how to achieve this by tweaking the system-wide settings of [qtchooser](http://code.qt.io/cgit/qt/qtchooser.git/) which is available on Arch Linux, Debian and Fedora while a manual approach has to be taken on openSUSE. The corresponding changes may or may not be reverted after installing meteo-qt depending on the needs of the respective system. To test whether `lrelease` is configured properly run `$ lrelease -version` which should output the desired Qt version like `5.5.1`. **Arch Linux** Install package ``` # pacman -S qt5-tools ``` This will pull in package `qtchooser` which has the usual link `/etc/xdg/qtchooser/default.conf` point to `/etc/xdg/qtchooser/5.conf` making Qt 5 the default. **Debian, Derivatives** Install packages ``` # apt-get install pyqt5-dev-tools qttools5-dev-tools ``` To make Qt 5 the default version either install package `qt5-default` in addition or create a symbolic link ``` # ln -s /usr/share/qtchooser/qt5-x86_64-linux-gnu.conf /usr/lib/x86_64-linux-gnu/qtchooser/default.conf ``` where the architecture, here `x86_64-linux-gnu`, may have to get adjusted to the current system. **Fedora** Install packages ``` # dnf install python3-qt5-devel qt5-linguist qtchooser ``` To make Qt 5 default run ``` # update-alternatives --config qtchooser-default ``` follow the instructions and log out and in again. (Fedora is handling qtchooser by the [Debian Alternatives System](https://wiki.debian.org/DebianAlternatives), see `$ ls -l /etc/alternatives/qtchooser-* /etc/xdg/qtchooser/`. The binaries handled by qtchooser are placed at a location that's usually outside `$PATH` and added to the latter by files in `/etc/profiles.d/`, hence the need to log out and in again.) **openSUSE Leap** Install packages ``` # zypper install python3-qt5-devel libqt5-linguist ``` Make sure package `libqt4-linguist` which is the only package providing binary `lrelease` in `$PATH` isn't installed or move `/usr/bin/lrlease` to another location and run ``` # ln -s /usr/bin/lrelease-qt5 /usr/bin/lrelease ``` #### Installation To install run ``` # python3 setup.py install ``` in the source tree. Adding switch `--help` displays additional options. After installing that way a binary `meteo-qt` will be placed in `$PATH`, a [desktop entry file](https://www.freedesktop.org/wiki/Specifications/desktop-entry-spec/) `meteo-qt.desktop` in `$XDG_DATA_DIRS/applications` making the application available in the usual panel main menus. ### Binary packages #### Arch Linux [AUR](https://aur.archlinux.org) package [meteo-qt](https://aur.archlinux.org/packages/meteo-qt/) is providing the latest stable release, package [meteo-qt-git](https://aur.archlinux.org/packages/meteo-qt-git/) the latest checkout of branch `master`. #### Mageia Package [meteo-qt](http://madb.mageia.org/package/show/name/meteo-qt/) is providing stable releases. ## Configuration After installation you will be prompted to do a right click on the system tray icon to configure the cities, units and other settings for the weather informations and the application. ## Usage Not much to say. The window providing verbose information as depicted above will display upon left clicking the panel icon, a context menu coming up on right-click is providing several configuration options all of which should be pretty self-explanatory.
Generated by dwww version 1.15 on Sat May 18 12:15:45 CEST 2024.